How To Integrate PayUmoney With Shopify

If you have created your website on Shopify and want to give your customer the best experience, we have got you covered. Integrating PayUmoney with your website built on Shopify is easy! Read this blog to get a step by step guide and get started now.
1. Create an account on PayUmoney by entering your email ID.
Please note: Select ‘Become A Merchant’ to integrate your Shopify website with PayUmoney.
2. Further, enter your name and contact number & create a password. Add business details and get your bank account verified.
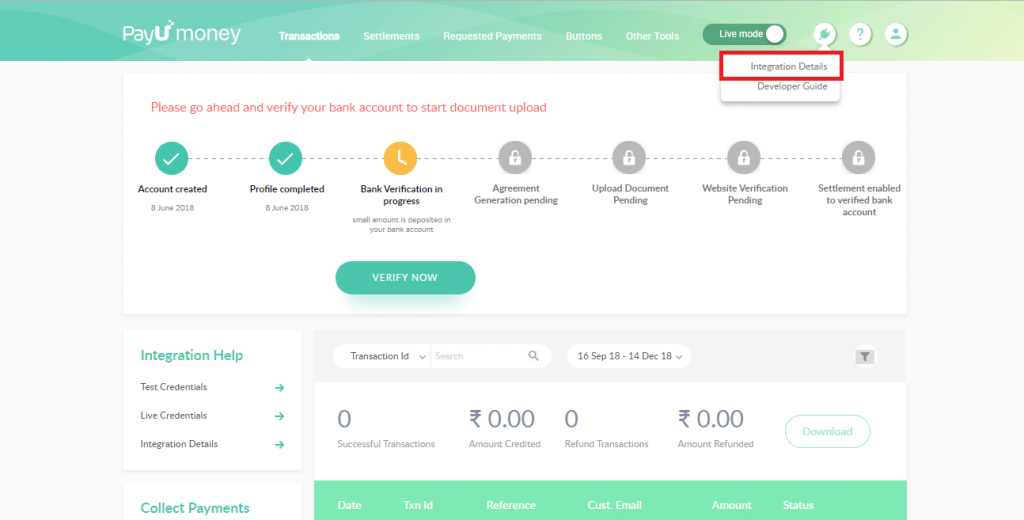
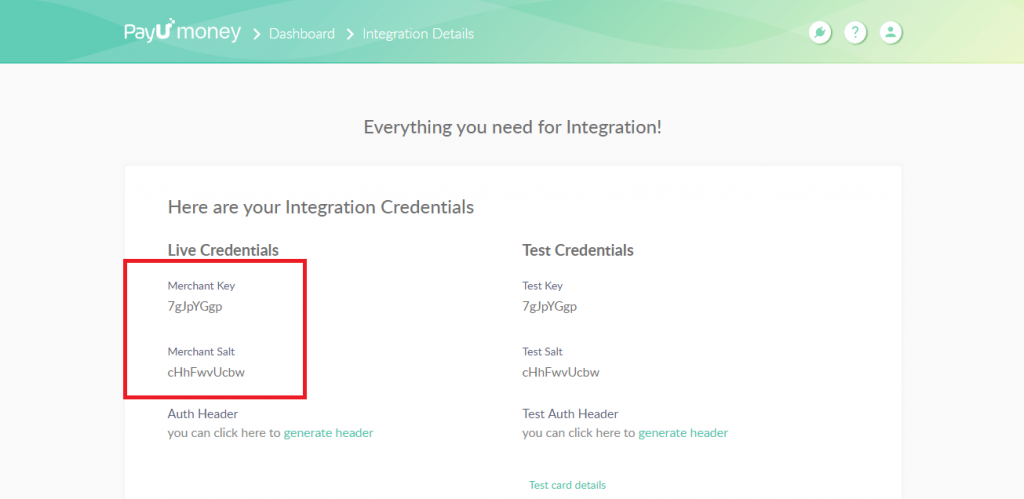
3. If you already have an account with PayUmoney, keep your key and salt details handy. Here’s how you can find your details:


4. Now login to your Shopify account.
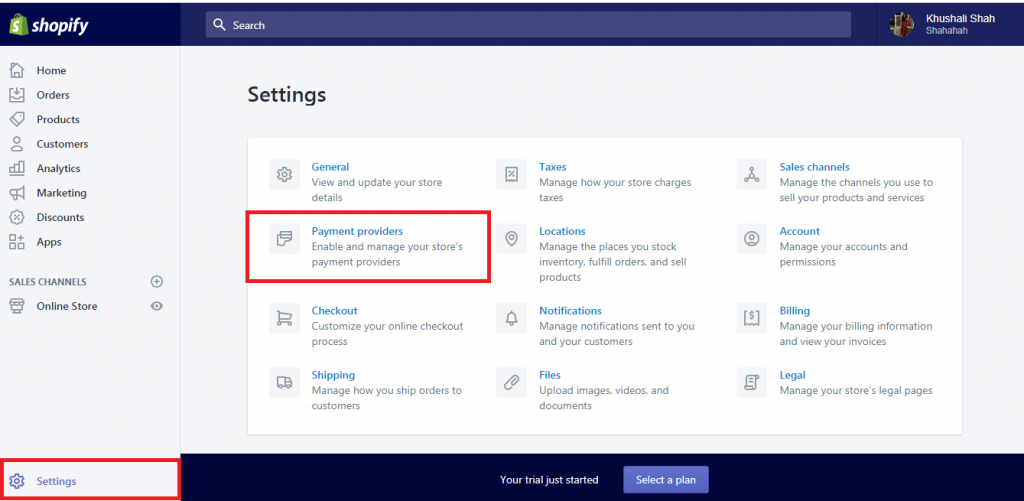
5. Click on ‘Settings’ and choose ‘Payment providers’.

6. Go to ‘Accept credit cards’ section and click on ‘Service Provider’. Choose PayUmoney from the list.

Please note: If your merchant account is with PayUmoney, it will only work with the option ‘PayU Money’ and not PayU India. PayU India is the option for the merchants who onboarded with PayUbiz.
7. Next, enter the merchant key and salt details available on PayUmoney dashboard and click on ‘Activate’ to start collecting payments via PayUmoney.
PayUmoney’s integration with Shopify is that easy. Now you are all set to accept online payments via India’s most trusted payment gateway- PayU. However, if you have any questions, please Contact Us and we will be happy to help you!
Grow your business effortlessly with PayUmoney.